This comprehensive user guide is designed to empower you with the knowledge and skills needed to unlock the full potential of the tool. Whether you are a seasoned presenter or a first-time user, this guide will walk you through the process of creating and organizing events, creating engaging presentations with various slide types, tracking attendance effortlessly, and even hosting captivating competitions. Navigate this guide to discover the features that make our tool a powerful and intuitive tool for hosts and attendees.
On the left side menu, go to Organizations tab. This section will contain all your assigned organizations. To assign a new organization, click on + Add New. This will enlist all the organizations currently being used in our database. You can assign an organization to yourself by clicking on it. If your organization is not already listed, you can click on create new and fill in the form by adding all required details. Note that the photo is optional to upload.

Once your organization is set up, let's dive into creating events. You can start by clicking the Create New + button on the dashboard or heading to the Events tab in the menu on the left. This section keeps track of all your events. On the events page, find the Create New + button at the top right, click it, and fill in the event details as prompted. Adding a picture and a short description is optional but can make your event more appealing. When you input the event's location, check the right side to see the timing and available slots. This helps you avoid clashes with other events and ensures everything runs smoothly. That's it – your event is good to go!

After an event is created, you can click on the event and view all its details along with QR code. Using this code, attendees will be able to join your event.
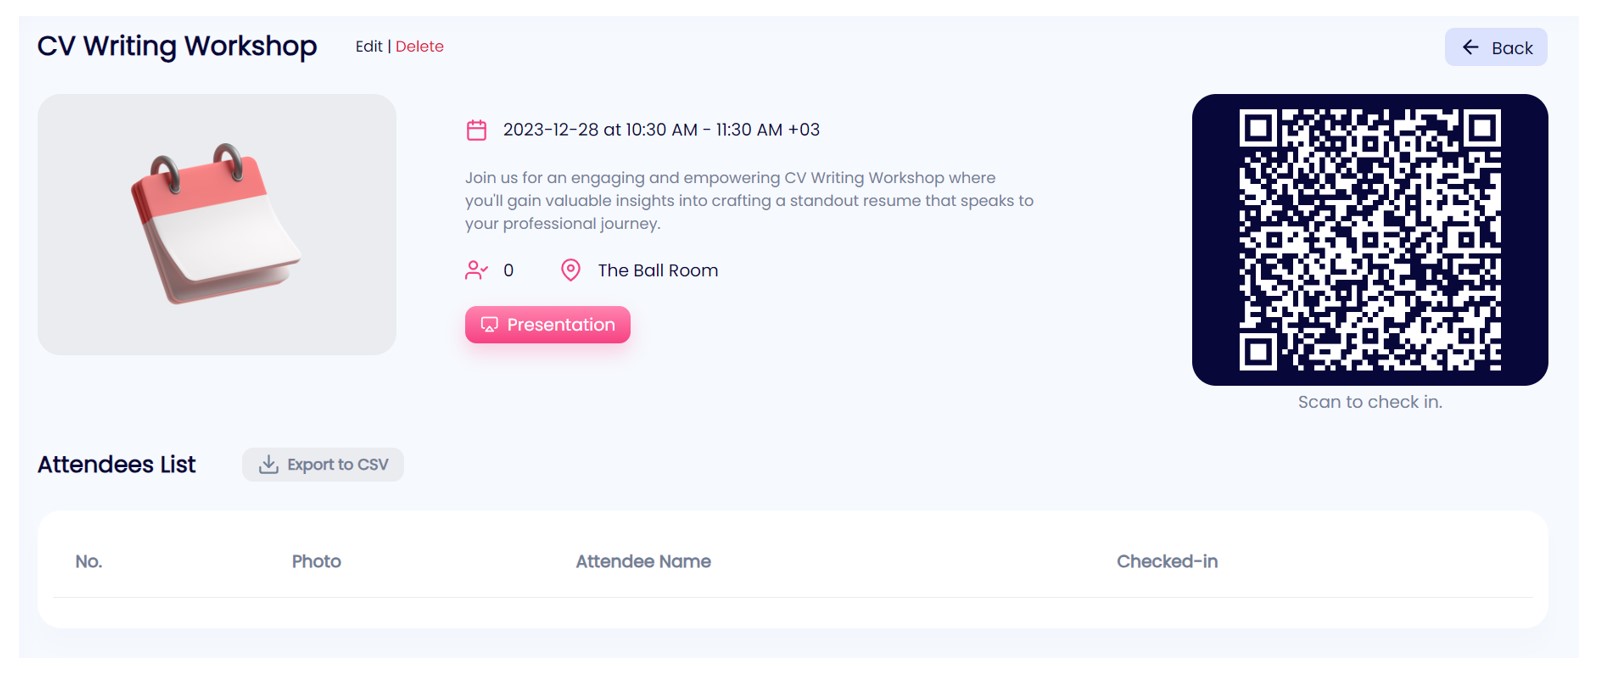
For a better view, you can click on the QR code and display the details on a wider view as shown below.
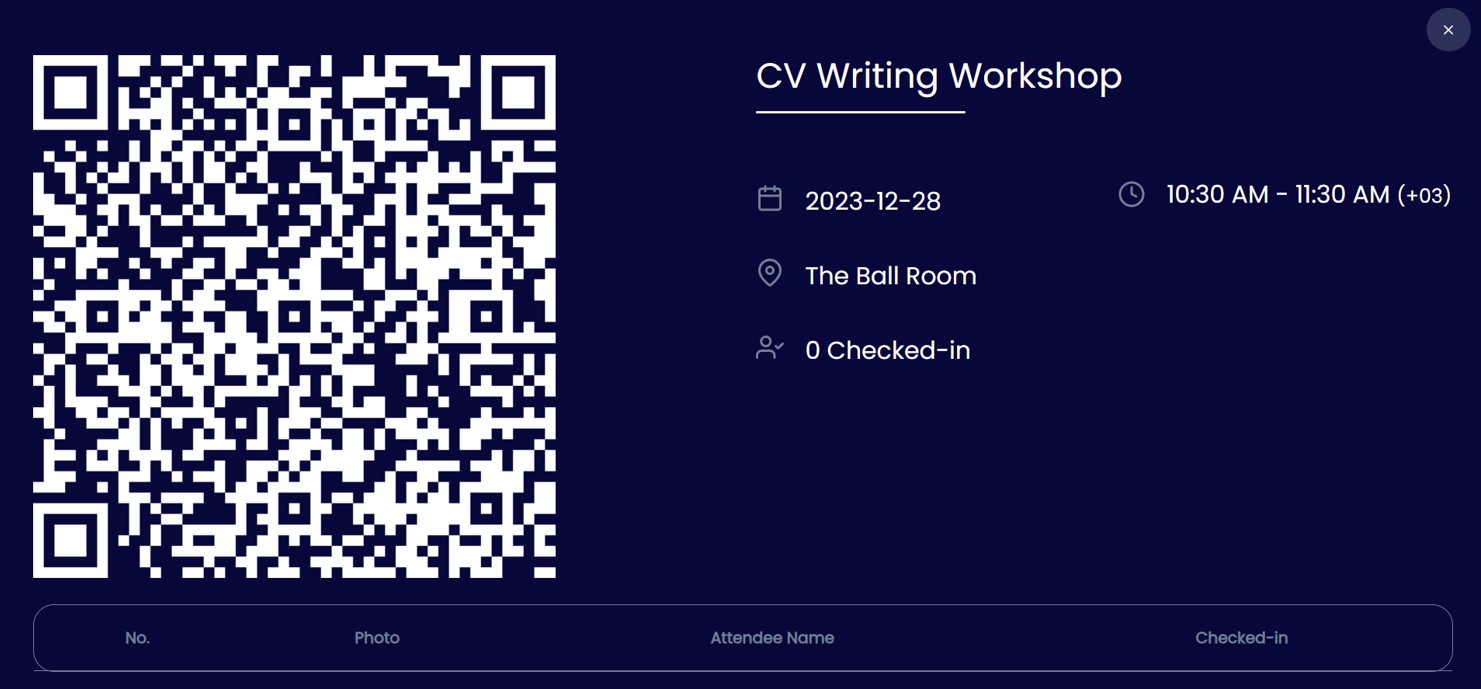
As attendees scan the QR code, they will be automatically checked in and shown on the attendees list instantly.
On the events page, you can click on the play icon to go to the event’s presentation.

You can also navigate to the presentation from the event’s details page.
There is one more way to create a presentation for any event. On the left side menu, click on the Presentations Workspace tab. Here you will be able to see all your presentations. To create a new presentation, click on the create new + button and choose from the events for which you want to create.
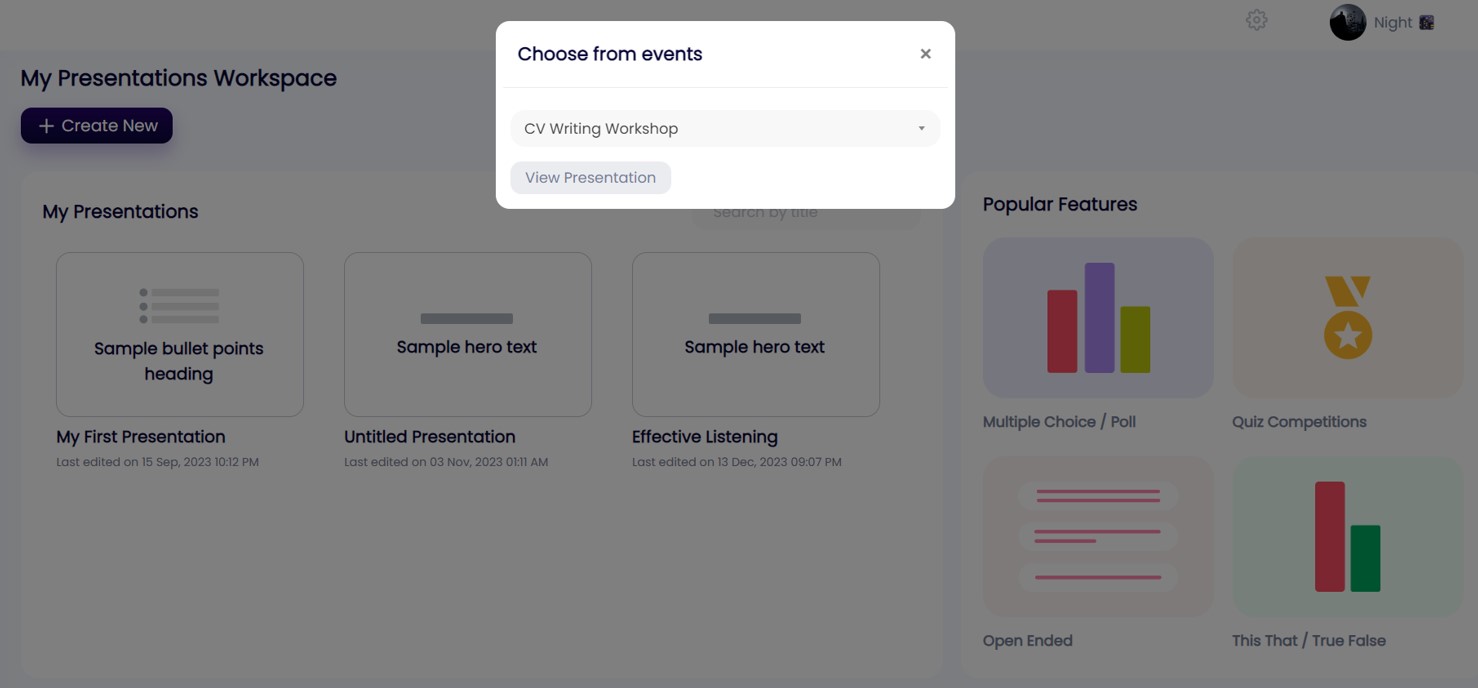
Now, a new presentation has been created for the event. Note that only one presentation can be created for one event.
Once a presentation has been created, you will be able to add or edit any slide.
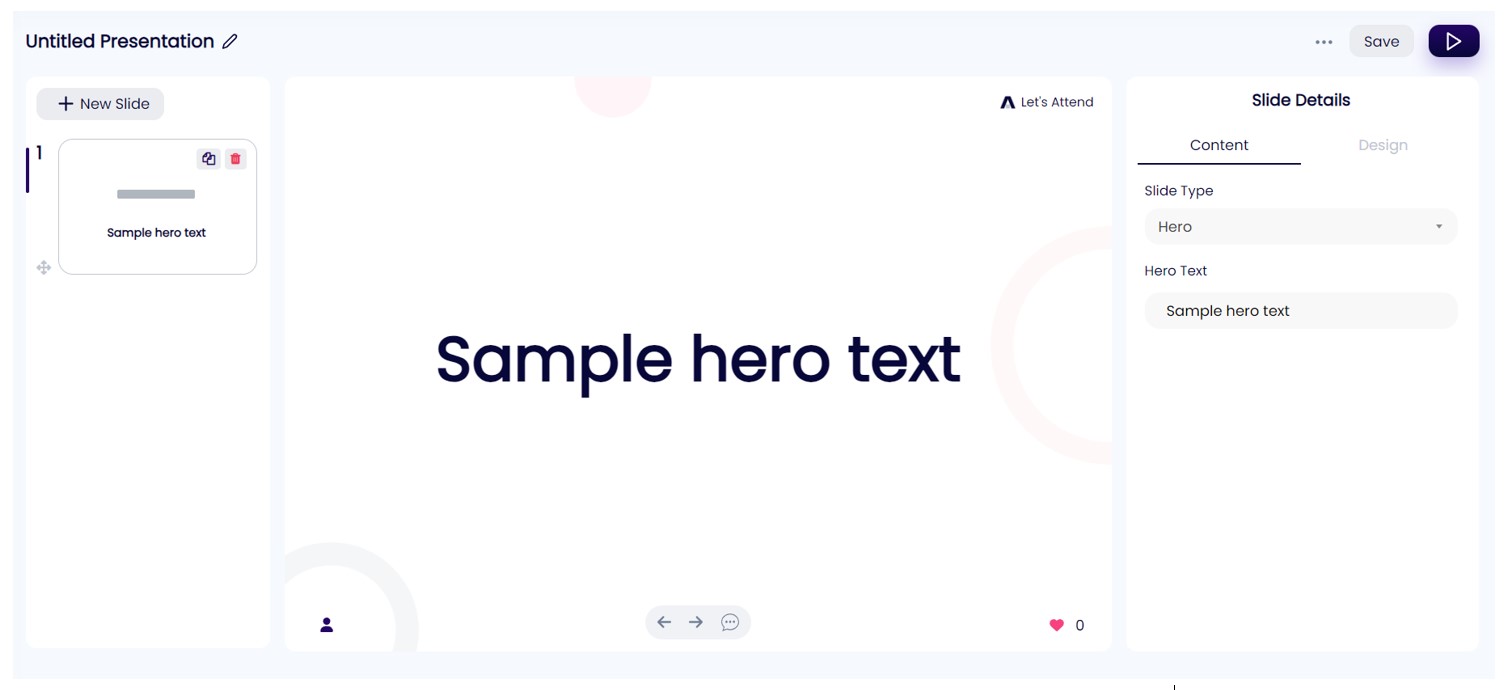
On the right side, you can see slide details including slide content and slide design. In the content tab, you can see slide type and slide content. Hero is the default type of the slide. Just edit the Sample hero text to update the slide content.
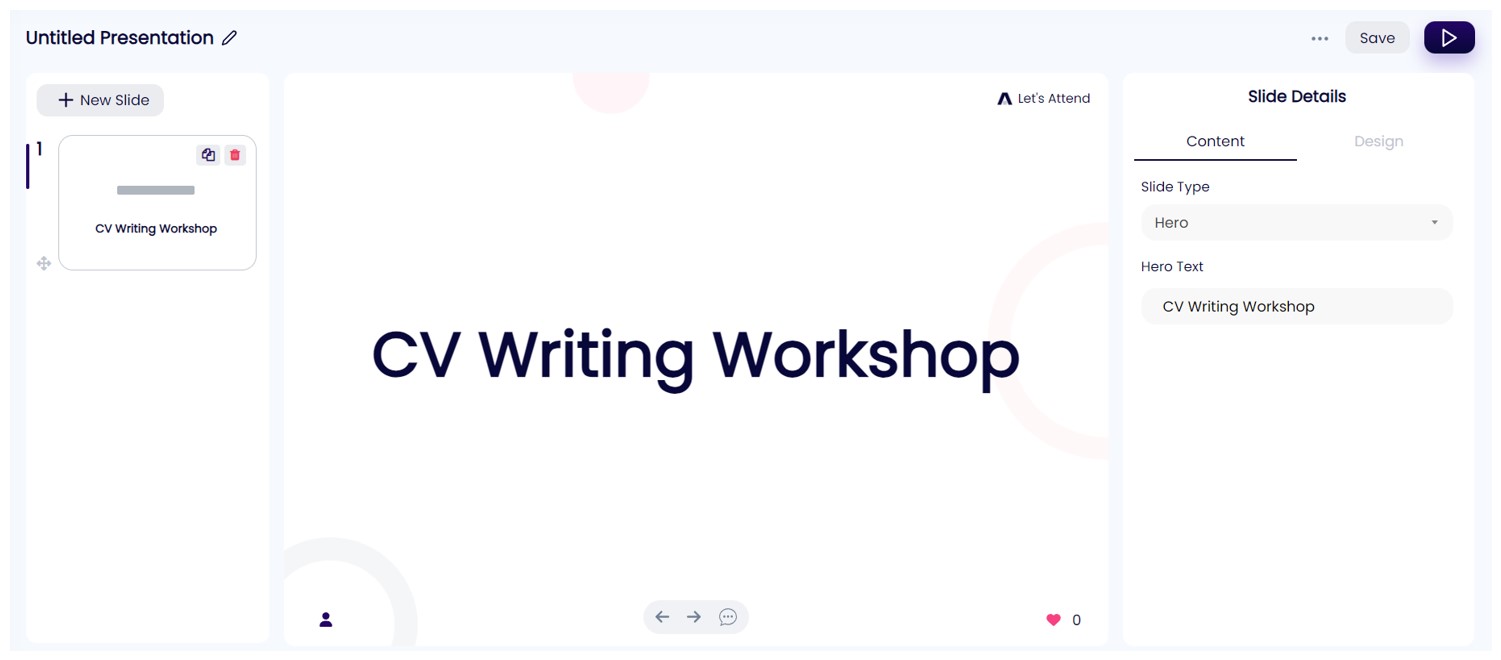
Explore various slide types to fit your content. Choose Heading for a title and subheading, Paragraph for text, Bullets for lists, Quote for a quote with the author, Number for emphasizing numbers with a brief description, and Video to embed a video using its URL. It's that simple – customize your slides and make your presentation shine!
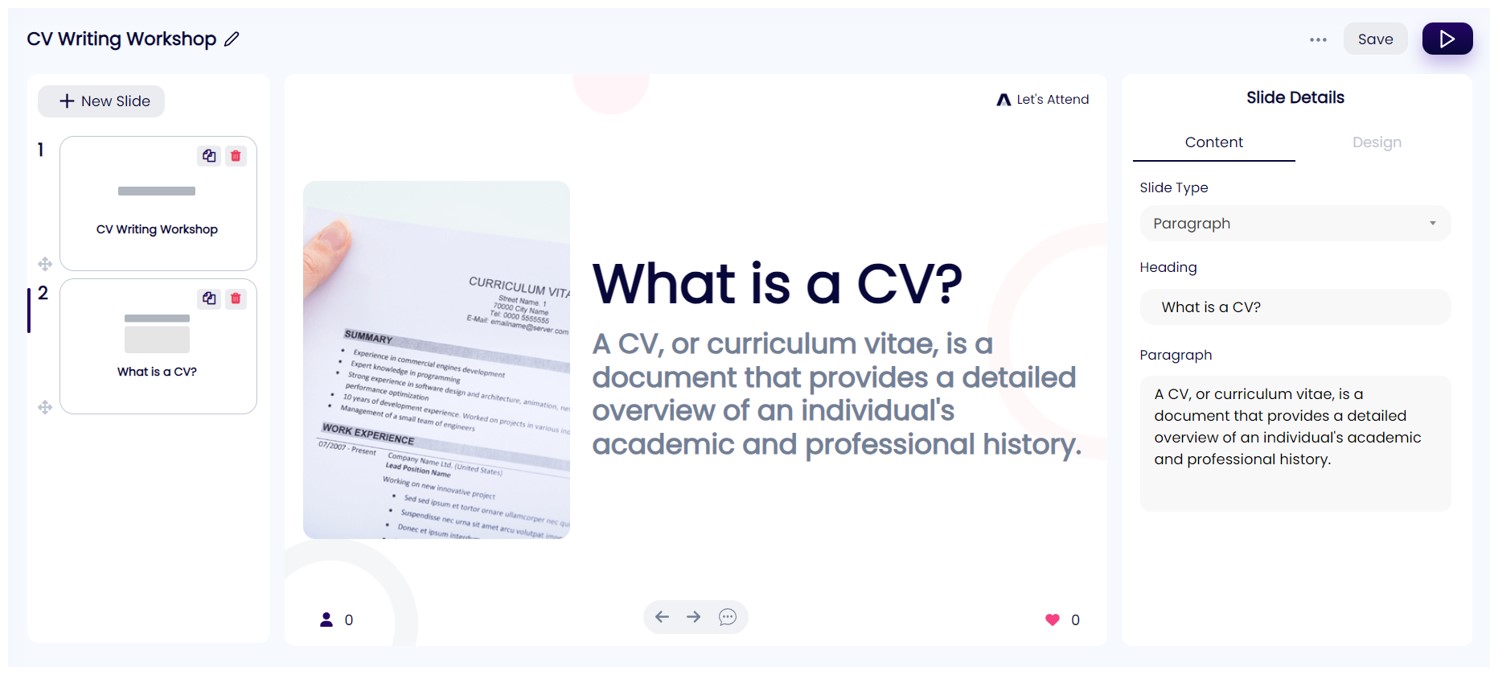
You can navigate the slides by using arrow keys on the keyboard or simply clicking on arrow icons located on the bottom of the slide.
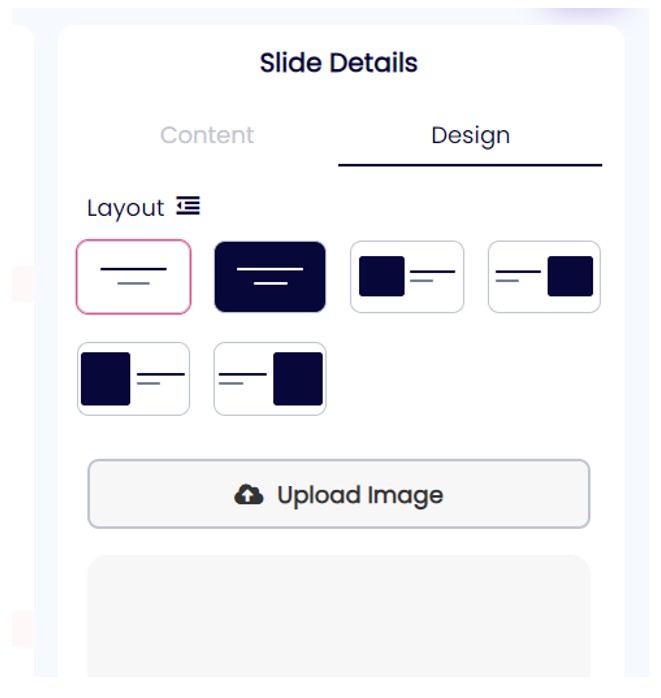
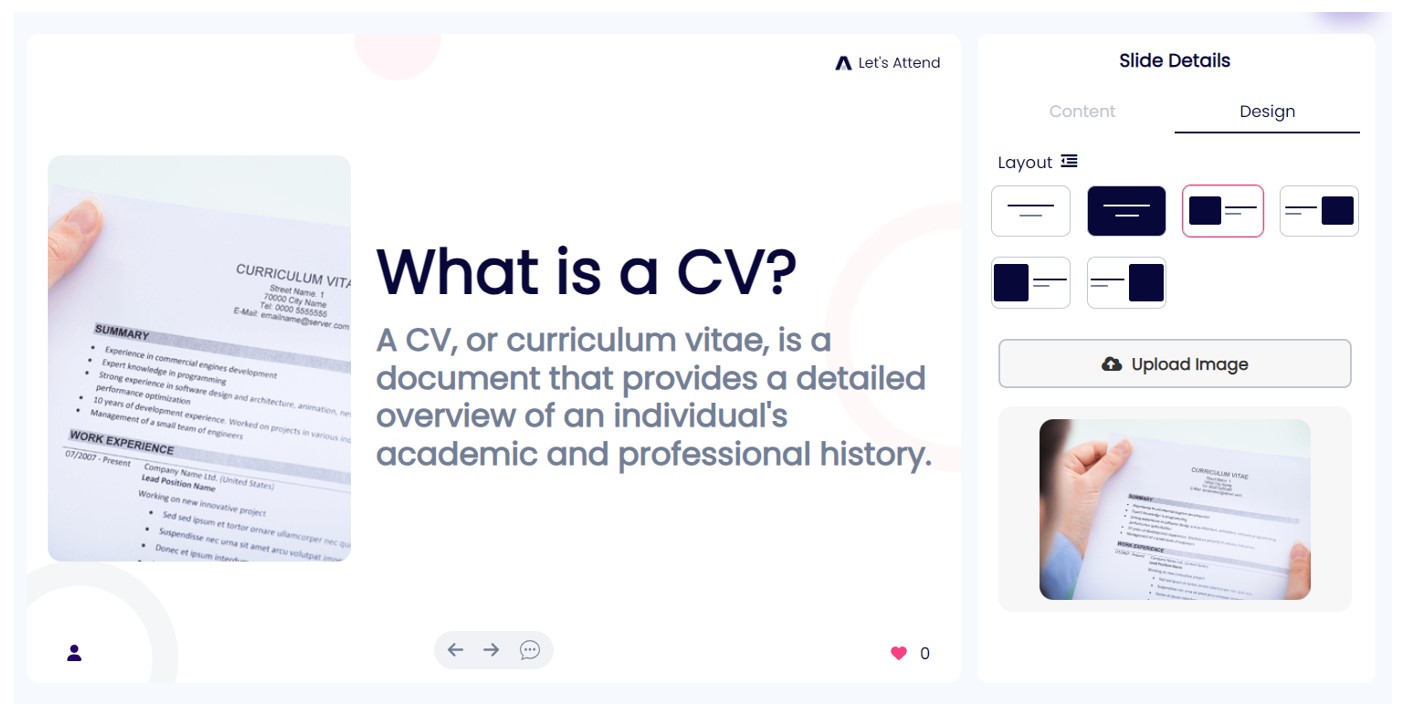
You can adjust the slide’s layout and upload an image on the slide by going to the Design tab. You can align content on left and right side as per suitable. Also, you can upload images on the desired sides of the slide.
To rename a presentation, click on edit icon next to the presentation name. A pop-up will appear and you will be able to rename the presentation. Note that for all changes to retain, make sure to save your presentation by clicking on the save button on top right. See more in step 8.

Elevate audience interaction by seamlessly integrating questions into your presentation. Whether you're seeking regular engagement or hosting a competition, our platform provides versatile question formats.
Regular Questions:
Incorporate questions seamlessly into your presentation, choosing from multiple-choice or polling, true/false or this/that, and open-ended.
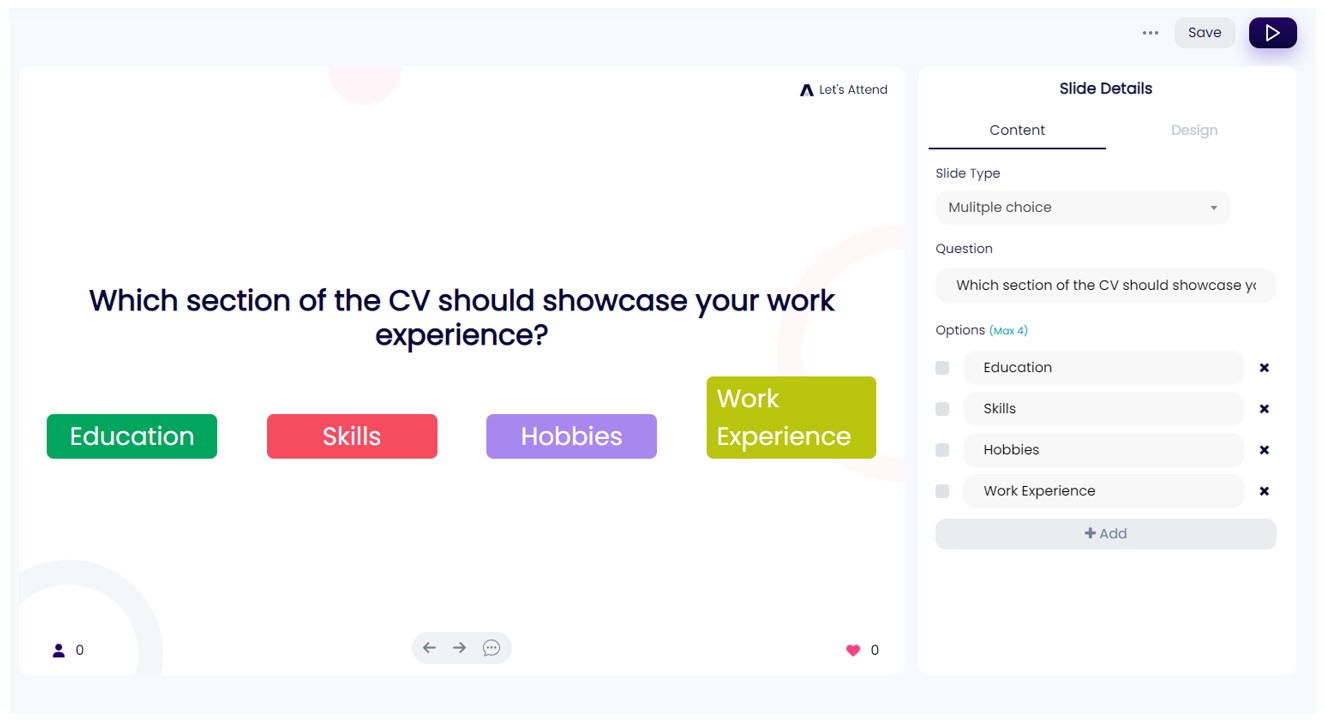
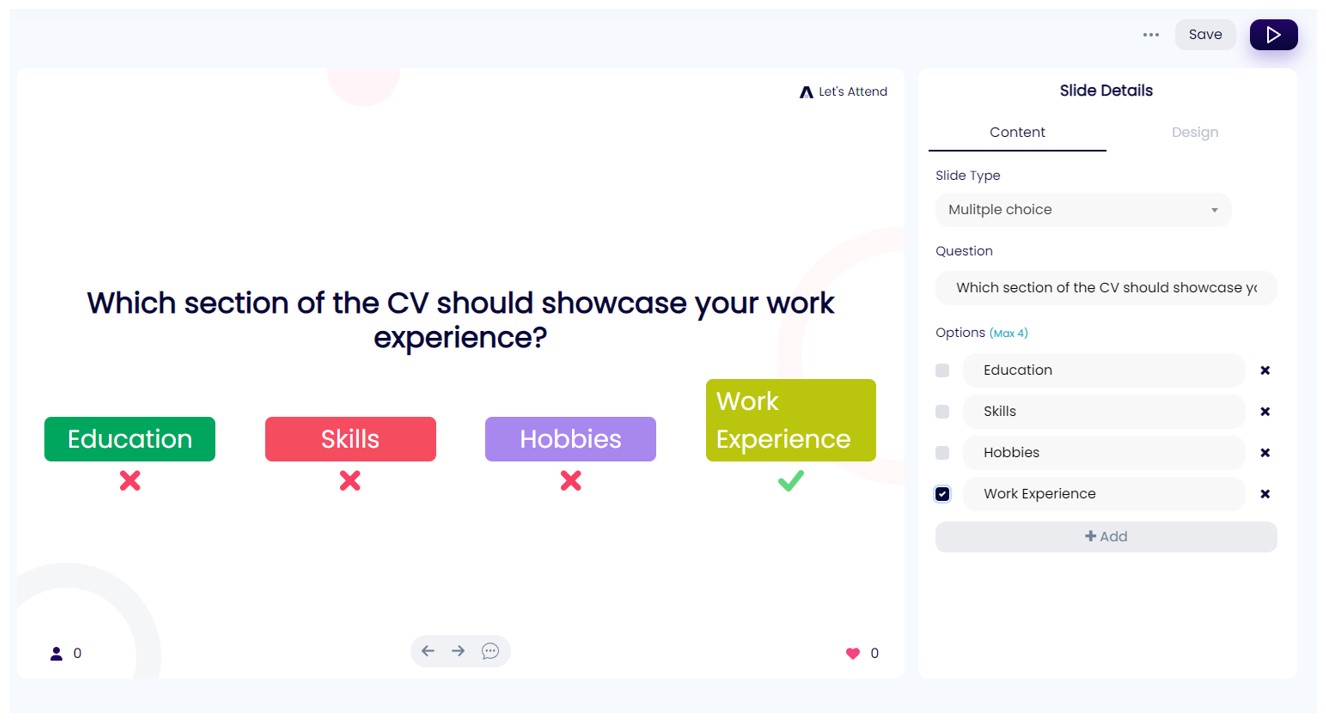
Multiple Choice (MCQs):
Pose questions with up to four options. Simply mark the correct answer by checking the checkbox next to the option.
True/False:
Create straightforward questions with two options. Choose the correct response by checking the box next to the option.
Open-Ended Questions:
Foster real-time interaction by allowing the audience to ask questions spontaneously. Their queries will dynamically appear during the presentation.
Adding Competition Slides:
For an exciting knowledge challenge, opt for multiple choice or true/false slide types under the competition section. When in presentation mode, these slides will feature a trophy icon in the top left corner, signaling a competition. You can also click on the answer icon to hide/un-hide the correct and wrong options.
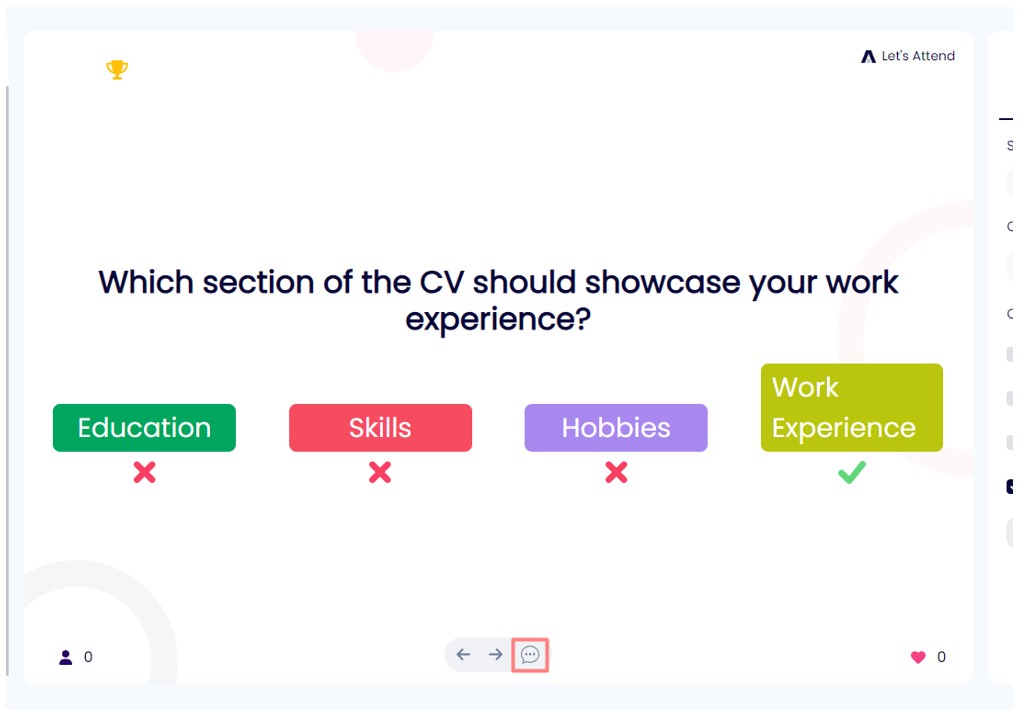
Go to presentation mode by clicking on the play button on top right corner. Note that if you can have any unsaved changes save first before going to presentation mode. Press the enter key to initiate the competition, revealing the question to participants.
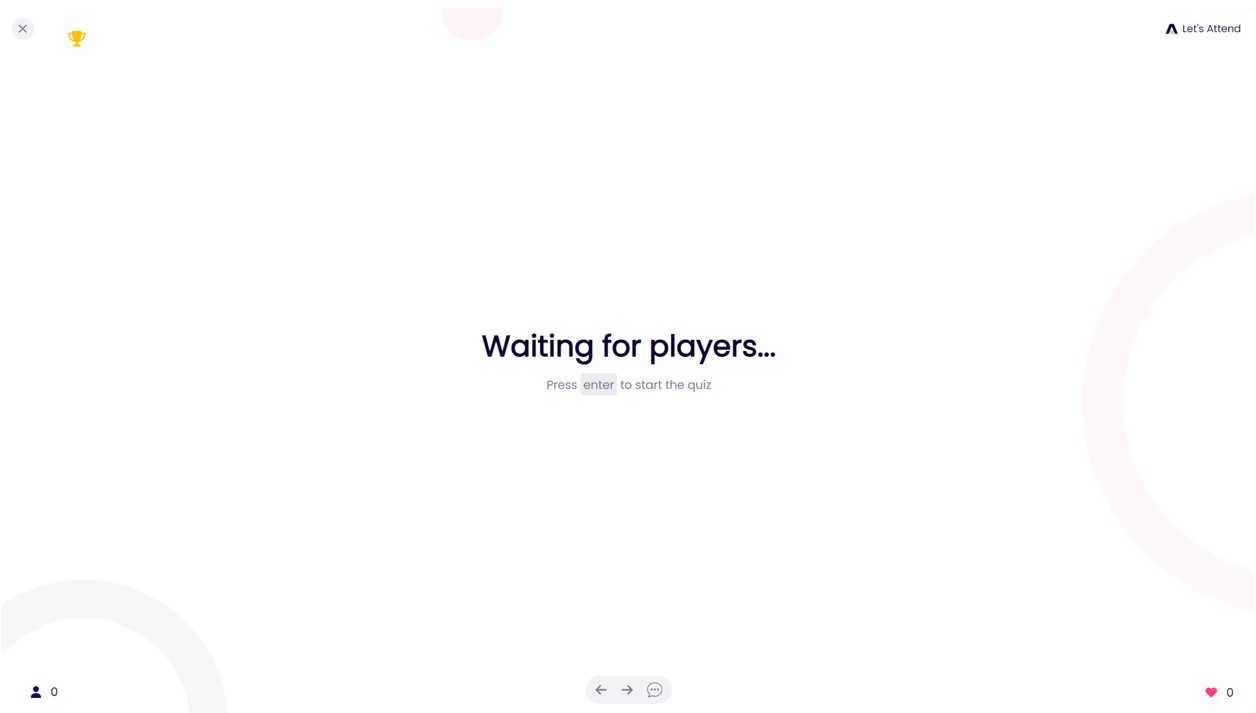
A timer counts down for 10 seconds, and after participants submit their answers, the correct and incorrect choices are displayed. Points are awarded based on response time, and the leaderboard can be viewed by clicking on the trophy icon.
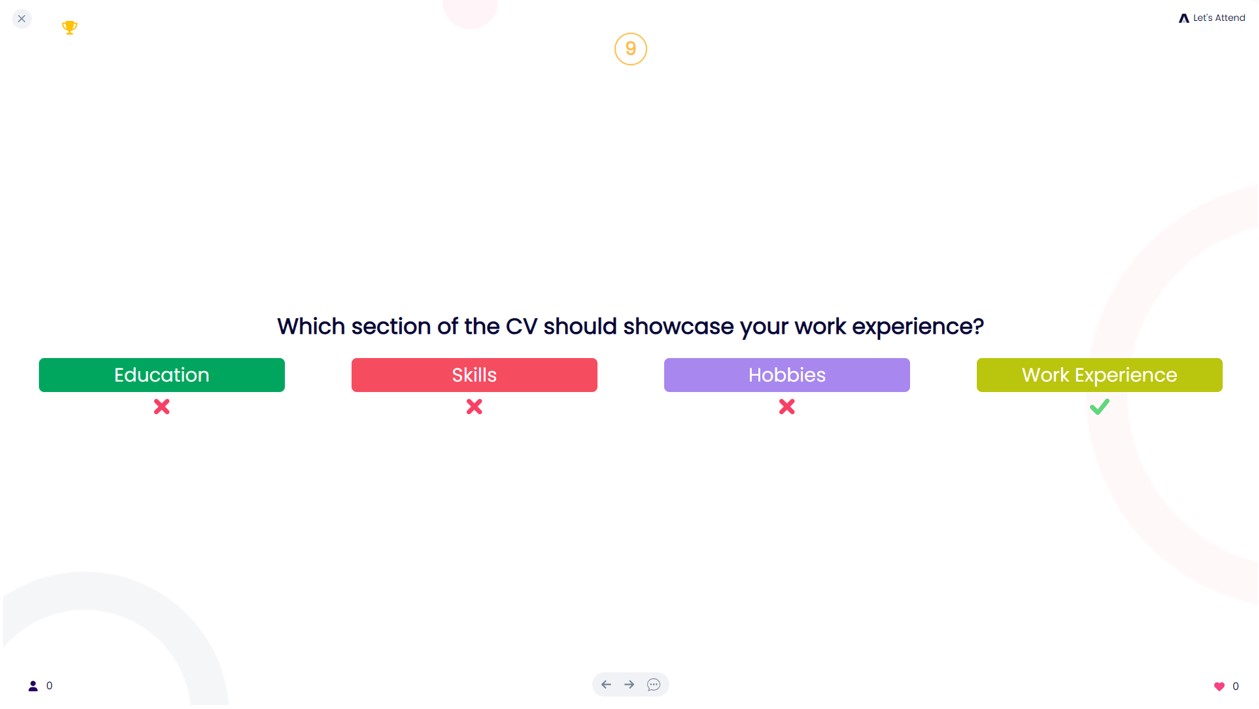
This innovative competition feature adds a competitive edge to your presentation, fostering engagement and excitement among your audience. Customize your questions, choose the competition mode, and watch as your event comes to life with dynamic and interactive elements.
Click on save and all slides will be successfully saved. Note that if in case there are any unsaved changes in the presentation and you try to reload the presentation, you will be asked to first save the presentation, so changes are not lost.
To duplicate a slide, you can just click on the copy icon on the mini slide preview on left side and the slide will be duplicated.
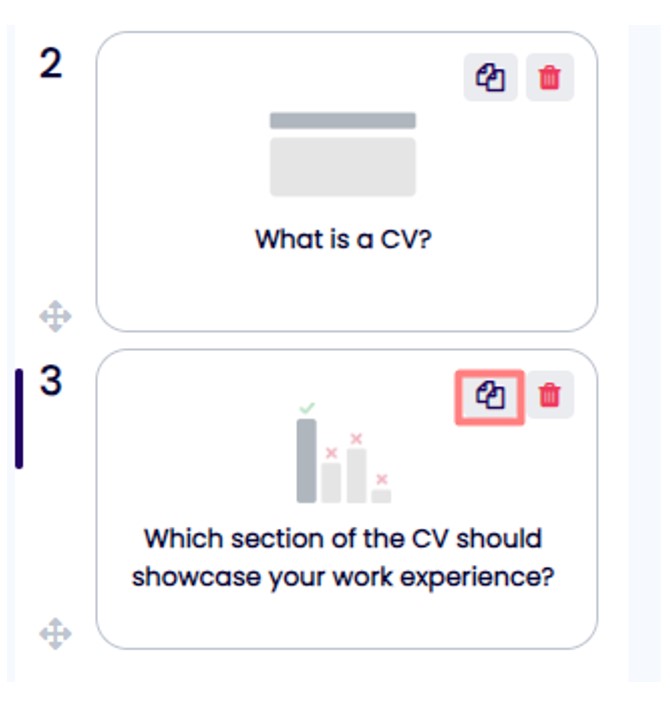
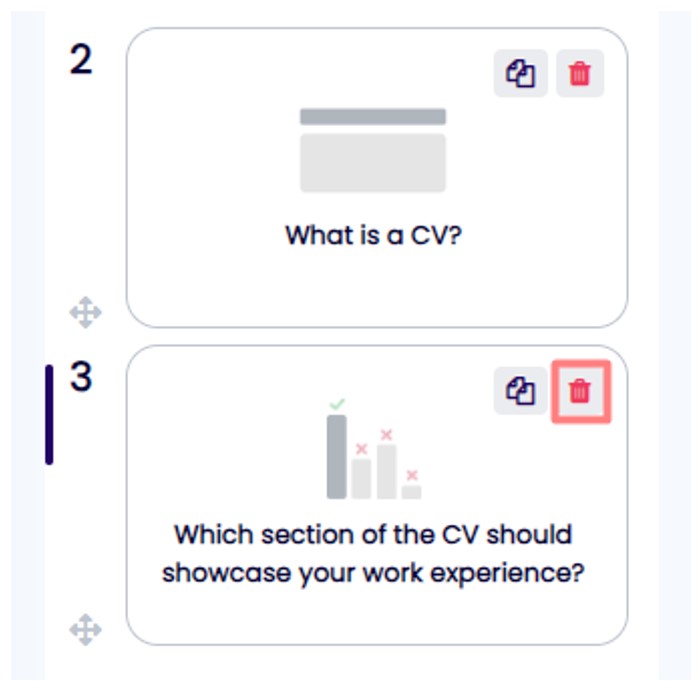
To delete a slide, you can just click on the delete icon next to duplicate icon on the mini slide preview and the slide will be deleted.
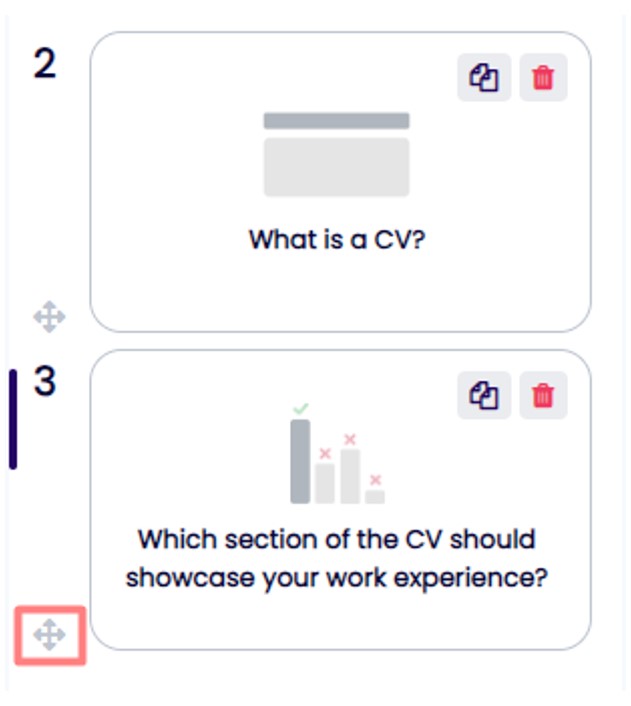
To reorder any slide, you can start dragging the slide by clicking on the four arrows icons and just dragging it wherever you want to order the slide.
Before start presenting, make sure all your changes are saved. To start presenting to the audience, just click on the present icon on top right side of the page and all slides will be in presentation mode.

In presentation mode, both the host and audience share the same slide view. As the host progresses through slides, the audience follows suit, ensuring everyone is on the same page. If a participant finds a slide appealing, they can instantly convey their appreciation by clicking the heart icon at the bottom right.
In this interactive setting, audience engagement goes beyond just liking slides. Participants can actively participate in competitions and respond to open-ended questions in real-time. Hosts receive immediate feedback as participants submit their answers and insights.
For added convenience, hosts can easily track audience interactions by clicking on the heart icon, where they can view the likes received.
Want to save the presentation for future reference? Follow these simple steps:
That’s it! All your slides will be exported to a PDF file, making it easy for you to review or share the presentation at your convenience. Enjoy the flexibility of having your content readily available in a downloadable format.
